Windows Embedded Standard 7 Image Tutorial
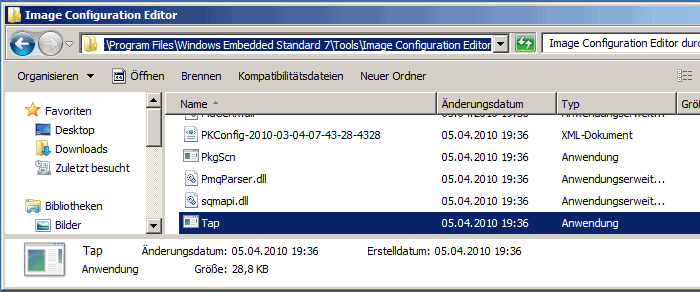
To install Windows Embedded Stardard 7 tools, you will need to create a device hardware configuration file for the target deviced by running a TAP.exe, which is installed with Windows Embedded Standard 7 tools. TAP.exe generates a .PMQ file that contains hardware information for the target device. TAP.exe can be found on:
C:\Program files\Windows Embedded Standard 7\Tools\Image Configuration Editor\
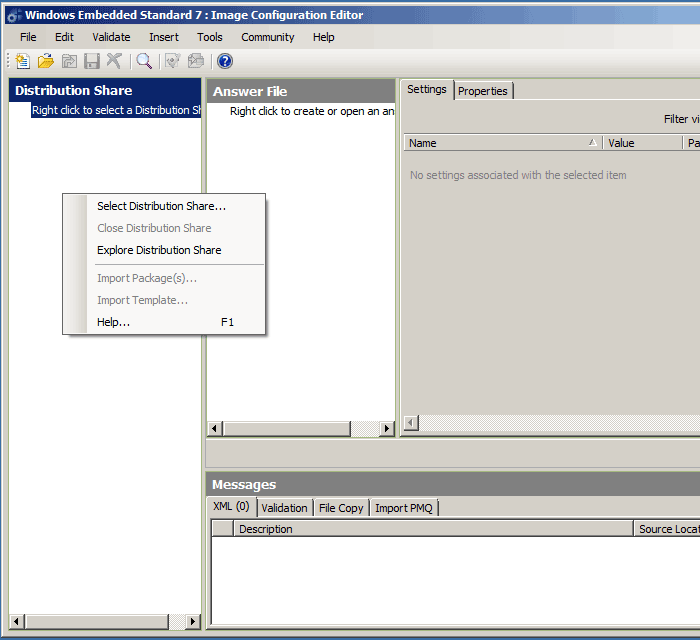
On the Start Menu, click All Programs, click Windows Embedded Standard 7, and then click Image Configuration Editor. In the Distribution Share pane, right-click the background and click Open Distribution Share to select a distribution share.
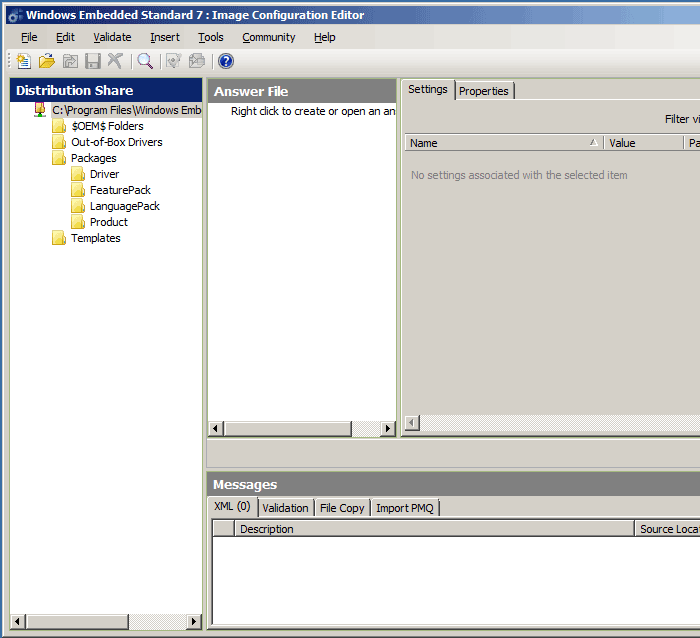
In the open dialog box please click on C:\Program files\WindowsEmbedded Standard 7\DS. The single modules are now hierarchically listed on the Distribution Share column.
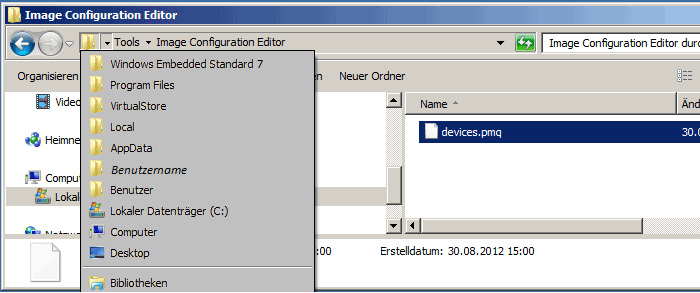
On the File menu, click New Answer File to create the XML configuration file. On the File menu, click Import, and then click Import PMQ. Select the device.pmq file, which was created through TAP.exe. This file can be found in C:\user\username\AppData\Local\VirtualStore\Program Files\Windows Embedded Standard 7\Tools\Image Configuration Editor.
Note: the folder AppDate is hidden. Make sure, that hidden folders are being shown.
Importing the file devices.pqm adds the required drivers to the Answer file pane. Create a run-time configuration image. In the Distribution Share pane, click Packages, and then click FeaturePack and add the packages listed below to the answer file. To add packages to the answer file, right-click the package and click Add to Answer File.
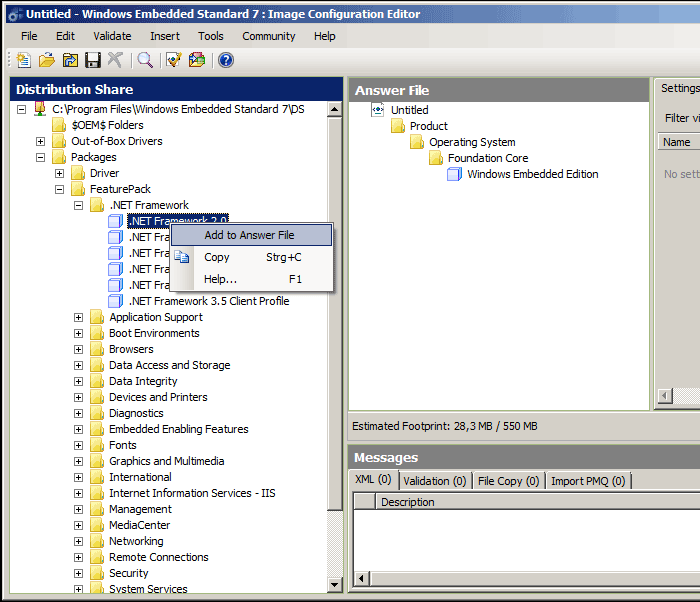
There is no limit to the number of packages that you can add to the answer file; however, the size of the image grows as you add more packages. The following packages are required to install Configuration Manager 2007 Advanced Client at run time on a Windows Embedded Standard 7 image:
- .NET Framework -> .Net Framework 2.0
- Application Support -> COM OLE Application Support
- Application Support -> COM+ Application Support
- Application Support -> Win32 Application Runtimes and Libraries
- Boot Environment -> Windows Boot Environment
- Management -> System Management -> Windows Management Instrumentation (WMI)
- Management -> Windows Update -> Windows Update Standalone Installer
- Management -> Windows Application Compatibility
- Networking -> Base ->Internet Authentication Service
- Networking -> Base -> Networking Base
- Networking -> BITS
- Networking -> Remote Access Service (RAS)
- Networking -> Small Networking Services
- Networking -> Windows Firewall
- Remote Connection -> Remote Desktop Connection
- System Services -> Windows Installer
- User Interface -> Windows Shell- >System Control Panel
- User Interface -> Windows Shell -> Windows Explorer Shell
- User Interface -> Command Prompt Shell with Custom Shell Support (Note you must select either this option or the Windows Explorer Shell Option)
When you have finished choosing all these packages, click on the Validate menu and then Validate only to get the dependencies to the selected components. You can also add dependencies by clicking Validate (Add Required Packages)on the Validate menu. This validates the packages and components in the answer file against their dependencies. To resolve any unresolved dependencies, double-click on any error messages on the messages window. Use the option provided to resolve them and finish by confirming with the OK.
Repeat the process with every error message On the File menu, click Save to save the answer file.
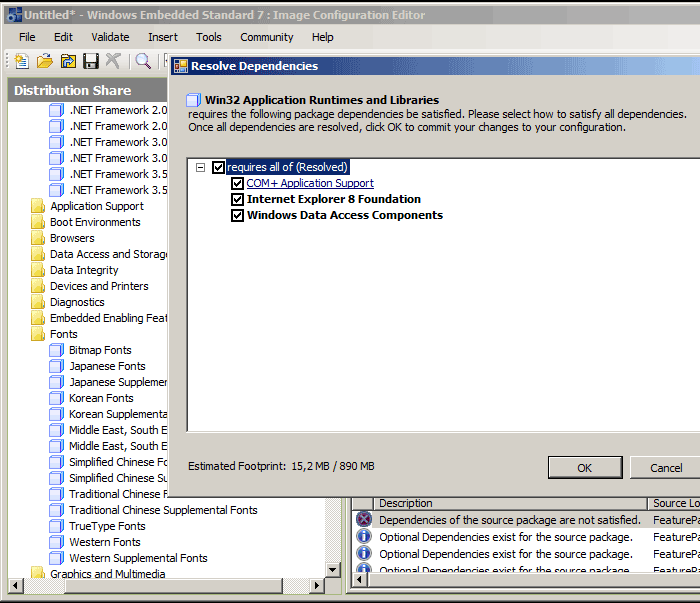
In the File menu click Save in order to save the Answer File. On the Tools menu click Create Media and then Create IBW Image from Answer file to create an operating-system image media. In the Create IBW disk dialog box choose where you want to generate the media (Select the target folder for the image box) and confirm it with OK.
Now install the image with the windows Embedded Standard 7 Image.
Install Windows Embedded Standard 7 Image
Create bootable media using a DVD, USB flash device, or virtual hard drive.
Play the bootable media with the created image.
Make sure that the device starts from the chosen media. Follow all the instructions on the screen.
